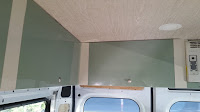
As I mentioned in the Woodwork Furniture I, the overhead cabinets are not shown on the floor plan. I wanted to run them for the full perimeter of the van under the ceiling except the entrance part of the sliding door between the kitchen cabinets and the passenger seat. Again, I wanted a simple construct not based on the wood frame-plywood structure with plywood doors. Instead I used the panels from Ikea (see Woodwork Furniture I).
The structural design is simple: bottom horizontal panel, narrow top horizontal holding the door hinges, vertical divider/support panels and doors.
The bottom panel I made from one large green/grey panel which I cut in three long strips 12"x96". This gave me the bottoms for all cabinets: one whole piece went for the passenger side cabinets and two other went for the driver side and the rear. It also determined the cabinet depth - 12".
As a proof of concept I started from the front driver side cabinet. It is the shortest and has only one vertical support since on the other side it is attached to the closet wall. The bottom panel lies flat on the van's top structural horizontal frame beam and is screwed to it in the very rear through the wooden support blocks at three points. In the front, left side is screwed to the closet wall and the right side to the vertical support wall, which is cut from the leftovers of the bottom panel.
 .
. .
.
The next step was to cut and glue with Sikaflex the rigid foam blocks to get the space for insulation and to equalize the depth of the structural frame pieces of the van. Then the havelock wool insulation was tucked between the foam blocks.
 .
.
I cut the rear wall of the cabinet from the rear wall of the Ikea wardrobe (it consist of three thin white boards). To give it the form needed, I made a partial cut (about half of the thickness) and bent it along the cut. Then I put some Sikaflex on the foam blocks and forced the bent rear panel into the cabinet. Since it was cut to the exact size and still retained some rigidity, it expanded a little and perfectly fitted the space between the ceiling panel an bottom cabinet panel:

The last step was to mount the doors. To hold the hinges, I cut the 5" wide strip from the side walls of the wardrobe, and screwed it to the ceiling plywood in several points. I used the similar hinges that came with the wardrobe, which I got for free from Ikea Returns and Exchange.
With doors, I encountered some problems. I did not have enough of the same color panels for all doors: I had two light green panels and two leftover light beige pieces from the bathroom-closet wall. So we decided to make the doors on the driver side from beige color (there are only two), and doors on the passenger side and rear (four altogether) of greenish color, of which I had plenty, but still not enough for all cabinet doors.
However, the length of beige pieces was slightly short of needed, so we decided to put narrow greenish inserts on both sides of the door. The design solution being achieved, I drilled round 1" holes for the hinges and pop-out lock buttons, hanged the door and installed pneumatic support lifts (both from Amazon:
https://www.amazon.com/gp/product/B075WLM9HK/ref=oh_aui_detailpage_o02_s00?ie=UTF8&th=1)
The final look of the cabinet is below. The solution of having the alternative color inserts happened to be very nice looking , so we decided to keep this idea for all other cabinets.
 .
.
The proof of concept being successful, I used the same approach to build all other cabinets.
First I installed the rear bottom panel for the full width of the van right under the AC. Then I mounted left and right bottom, attaching them the same way as in the first cabinet.
 .
. .
.The rear wall for the rear cabinet had to be constructed differently, since it was not decorative but structural. So I cut two pieces from the narrow greenish board (after calculating that I have enough of them for the doors) and mounted them by screwing to the rear top frame beam of the van and to the bottom panel. This provided needed rigidity for the rear bottom panel and finalized the structural stiffness of the whole cabinet unit.
 .
.
The doors for the passenger side I made from greenish panels and the rear driver side door - beige. Again, I used alternative color inserts to maintain the same pattern.
The final look of overhead cabinets is below. The images start from front driver side and continue around the van.
 .
. .
.More pictures with some of the doors open.
 .
. .
. .
.
 .
.
 .
.
 .
.

 .
.
No comments:
Post a Comment